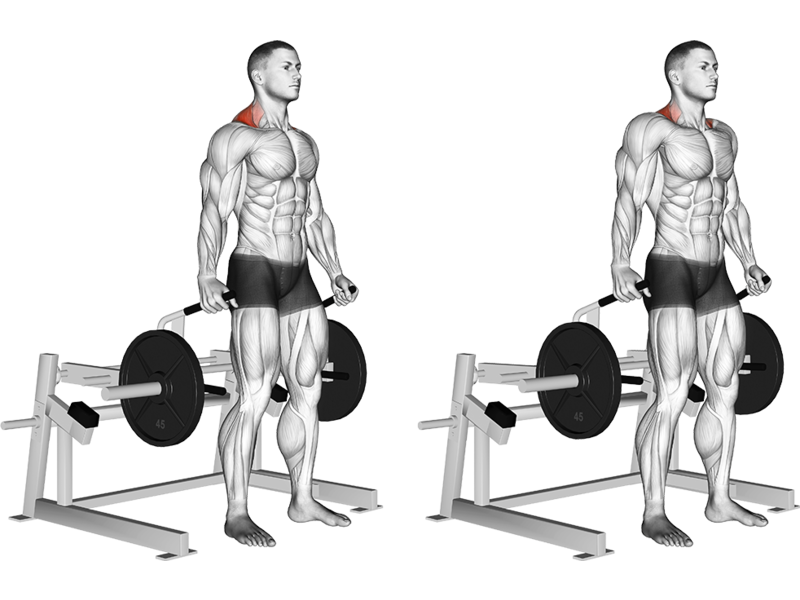
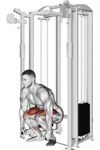
How to perform Leverage Machine Shrug with proper form
Setup
- Select the Weight: Adjust the machine to a suitable weight for your experience level.
- Position Yourself: Stand inside the machine, placing your back against the pad. Feet should be shoulder-width apart on the platform.
Grip
- Hand Position: Grasp the handles or the designated grip area. Your arms should be straight down at your sides.
Starting Position
- Posture: Engage your core, keep your back straight, and shoulders relaxed.
- Initial Adjustment: Ensure your shoulders are just below the shoulder pads.
Execution
- Lift Shoulders: Inhale and lift your shoulders upward as high as possible, focusing on squeezing your trapezius muscles.
- Pause: Hold the contracted position for a moment at the top of the movement.
- Lower Shoulders: Exhale as you slowly return your shoulders to the starting position, maintaining control throughout the descent.
Tips for Proper Form
- Avoid Leaning Forward or Back: Keep your torso stationary throughout the movement to isolate the trapezius muscles.
- Controlled Movement: Focus on smooth, controlled lifts and lowers to maximize tension in the muscle.
- Breathing: Inhale during the lift, exhale during the lower.
Common Mistakes
- Using Momentum: Do not use your arms or body to lift; focus on using only your shoulders.
- Excessive Weight: Lifting too much can lead to improper form and injury; ensure you can maintain proper technique throughout the movement.
By following these guidelines, you can effectively perform the Leverage Machine Shrug and target your trapezius muscles efficiently.
Exercises

Back Extension, Bodyweight
Type: Lower, Core
Target: Back
Synergist: Glutes, Hamstrings
Back Extension, Leverage Machine
Type: Lower, Core
Target: Back
Synergist: Glutes, Hamstrings
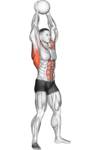
Ball Slams, Medicine Ball
Type: Core, Upper
Target: Shoulders, Back
Synergist: Chest, Abs

Bent Over One Arm Row, Dumbbell
Type: Upper, Pull
Target: Back
Synergist: Shoulders, Biceps, Forearms, Chest

Bent Over Row, Barbell
Type: Upper, Pull
Target: Back
Synergist: Shoulders, Biceps, Forearms

Bent Over Row, Cable
Type: Upper, Pull
Target: Back
Synergist: Shoulders, Biceps, Forearms

Bent Over Row, Dumbbell
Type: Upper, Pull
Target: Back
Synergist: Shoulders, Biceps, Forearms
Bent Over Row, Smith Machine
Type: Upper, Pull
Target: Back
Synergist: Shoulders, Biceps, Forearms
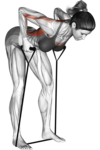
Bent Over Row, Band
Type: Upper, Pull
Target: Back
Synergist: Shoulders, Biceps, Forearms

Bent Over Row, Leverage Machine
Type: Upper, Pull
Target: Back
Synergist: Shoulders, Biceps, Forearms

Chin Up, Bodyweight
Type: Upper, Pull
Target: Back
Synergist: Biceps, Forearms, Shoulders, Chest
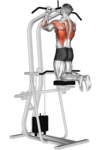
Chin Up, Leverage Machine
Type: Upper, Pull
Target: Back
Synergist: Biceps, Forearms, Shoulders, Chest
Clean, Barbell
Type: Upper, Lower, Push
Target: Glutes, Hamstrings, Quadriceps, Back, Shoulders
Synergist: Calves, Biceps, Chest, Forearms
Clean and Jerk, Barbell
Type: Upper, Lower, Push
Target: Glutes, Hamstrings, Quadriceps, Back, Shoulders
Synergist: Calves, Biceps, Chest, Forearms

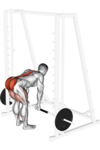
Deadlift, Barbell
Type: Lower, Pull
Target: Glutes, Back, Hamstrings
Synergist: Quadriceps, Calves, Abs, Forearms
Deadlift, Cable
Type: Lower, Pull
Target: Glutes, Back, Hamstrings
Synergist: Quadriceps, Calves, Abs, Forearms
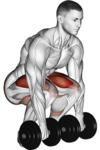
Deadlift, Dumbbell
Type: Lower, Pull
Target: Glutes, Back, Hamstrings
Synergist: Quadriceps, Calves, Abs, Forearms
Deadlift, Smith Machine
Type: Lower, Pull
Target: Glutes, Back, Hamstrings
Synergist: Quadriceps, Calves, Abs, Forearms
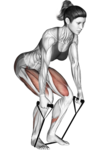
Deadlift, Band
Type: Lower, Pull
Target: Glutes, Back, Hamstrings
Synergist: Quadriceps, Calves, Abs, Forearms

Deadlift, Kettlebell
Type: Lower, Pull
Target: Glutes, Back, Hamstrings
Synergist: Quadriceps, Calves, Abs, Forearms